The Documentation Mode - How to use
- Introduction
- Scenarios - Overview
- Scenarios - How to document something
- You have to schedule a new task
- An already scheduled task has changed and needs documentation update
- A meeting happens or has happened
- A meeting is about to happen in the near future, and you need to note done some topics for this meeting
- Some know-how information arrives
- You want to document some noteworthy event just for yourself (“diary scenario”)
- You need to review and then move the information you have collected to the correct location
- You need to Git commit and push something
- Scenarios - How to find something back which you have documented earlier
This document describes several workflows for a small group of people working together to
- document meetings that have happened, are currently going on, or will happen in the near future,
- describe and schedule tasks which need to be done by someone, and
- find information quickly, typically while a meeting is just going on.
Introduction
Maybe you are not aware of it, but each time when you need to document something or set a reminder to perform a given task, you most likely follow some kind of rules. These rules tell you how to write down information in such a way that you can find it back later and get reminded of some work you need to do. If you work alone, then these rules do not necessarily need to be defined in a document because you have them already implicitly stored in your head.
But as soon as you work together with other people, you need to agree on a set of such rules. Otherwise, without such explicit rules, everyone will follow own implicit rules, and most likely these different rules will not fit together well. The result would be chaos, and the world as we know it would stop to exist. To avoid this chaos at least for me, I have described these rules and the used tooling in this document.
Whenever I start documenting something according to these rules, I call this “Switching myself into documentation mode”. This “switching into a mode” analogy originates from classic text editors like “vi” in which I also have to switch between different edit modes depending on the type of text manipulation I want to do. Also, Emacs – the text editor which is the basis for our tooling – contains a concept of so-called major and minor modes. So yes, calling this a mode is an intended pun related to Emacs and its modes.
To be more concrete about the used tooling:
-
The tooling is based on Emacs and the so-called “Org Mode” which enriches Emacs with a huge feature set for planning tasks.
-
Along with Emacs and Org Mode, I use Git to both create backups and synchronize all the content between the team members.
In the other part of this document you will find information about how to configure all this. But even with best configuration, tools are just tools, and they still need to be used by me.
Therefore, this document explains how to use the tools to apply the set of rules of the documentation mode in my everyday work. For example, I describe the various steps for the typical scenario “I need to note down that I have to do something next week”.
I hope that after reading the document you might be interested enough to try this documentation mode yourself. And in case you and I would become part of the same team, we could directly use everything to work together. In fact I already had the chance to use this documentation mode approach in a (small) team. Until end of 2020 a former colleague and I used this documentation mode all the time to coordinate our work and share information about what has been going on.
Scenarios - Overview
This section defines the various steps we take for typical scenarios which require us to deal with documentation and planning.
Each scenario is somehow triggered by an event which just has ocurred or is about to happen. Typical examples of such types of events are:
- A phone call coming in
- An email coming in
- An idea popping up to your mind
- A colleague talking to you
- Some useful information coming across
- A meeting taking place
- Some knowledge being gathered
The first step directly after such a trigger has occurred is to bring ourselves in “documentation mode” as soon as possible. The goal is to take notes while the event is still ongoing because a) we normally don’t have the time to start documenting everything afterwards, and b) the chances that we forget to write down important information are lower. While the event still goes on, we document all relevant information.
It takes a bit of practise to be able to participate in a discussion, and at the same time take some notes. In case you realize that you cannot cope with doing both, I recommend to just make it transparent to other people. Say something like: “Oh, could we please just wait a minute, I would like to take some notes before we continue.” From my experience this is no problem that the others need to wait a few seconds before the discussion can move on. As a token of compensation you can also offer to send the minutes of meeting right after the meeting, as some kind of convenience service. Typically, people then are more than happy to show some little patience if they don’t have to write the minutes themselves.
Coming back to “We document all relevant information”: What exactly the relevant information is depends heavily on the concrete event. It can only be on you to decide on a case-by-case basis what to note down and what not. This decision becomes even more difficult as you don’t know what others think about the importance of information. Besides, when such an event starts, it can happen that you don’t know which direction the event will take. A beginning like “Erm, do you have a minute or two, I would like to discuss some small topic with you” which results in an half-hour phone call with three follow-up tasks does not sound too exotic. But this is (professional) life which you cannot really change, but you can become prepared.
Therefore, I compiled the following list of scenarios which can give us a guideline for how to document such events. For each scenario I assume that you have your Emacs properly configured, opened, and in focus. Sometimes, these scenarios can become sub scenarios which you execute while still being in the super scenario. Typical example: You are in a meeting, and you have already started the meeting scenario. Suddenly you realize that you also have to create a task because this is one of the results of that very meeting. You deal with this situation by just starting a new scenario for planning a task. Once you have finished the task planning scenario, you can just continue with the meeting scenario.
So, enough of the pre-talk – let’s get started with something concrete. There are two type of scenarios: Either you need to document something, or you need to find back something which you have documented in the past.
Scenarios - How to document something
In this section I describe the concrete workflow for grabbing information in various situations.
The last two subsections are very inportant because they describe how to shift your information to the correct location and how to use Git to properly publish (and backup it!).
You have to schedule a new task
Most likely this is the most useful and used scenario: Someone (most likely: you) needs to perform a task. Now you need to note down the details in such a way that you can use the tooling to keep track of the task’s progress.
To do so, perform the following steps:
| No. | Step description | Shortcut |
|---|---|---|
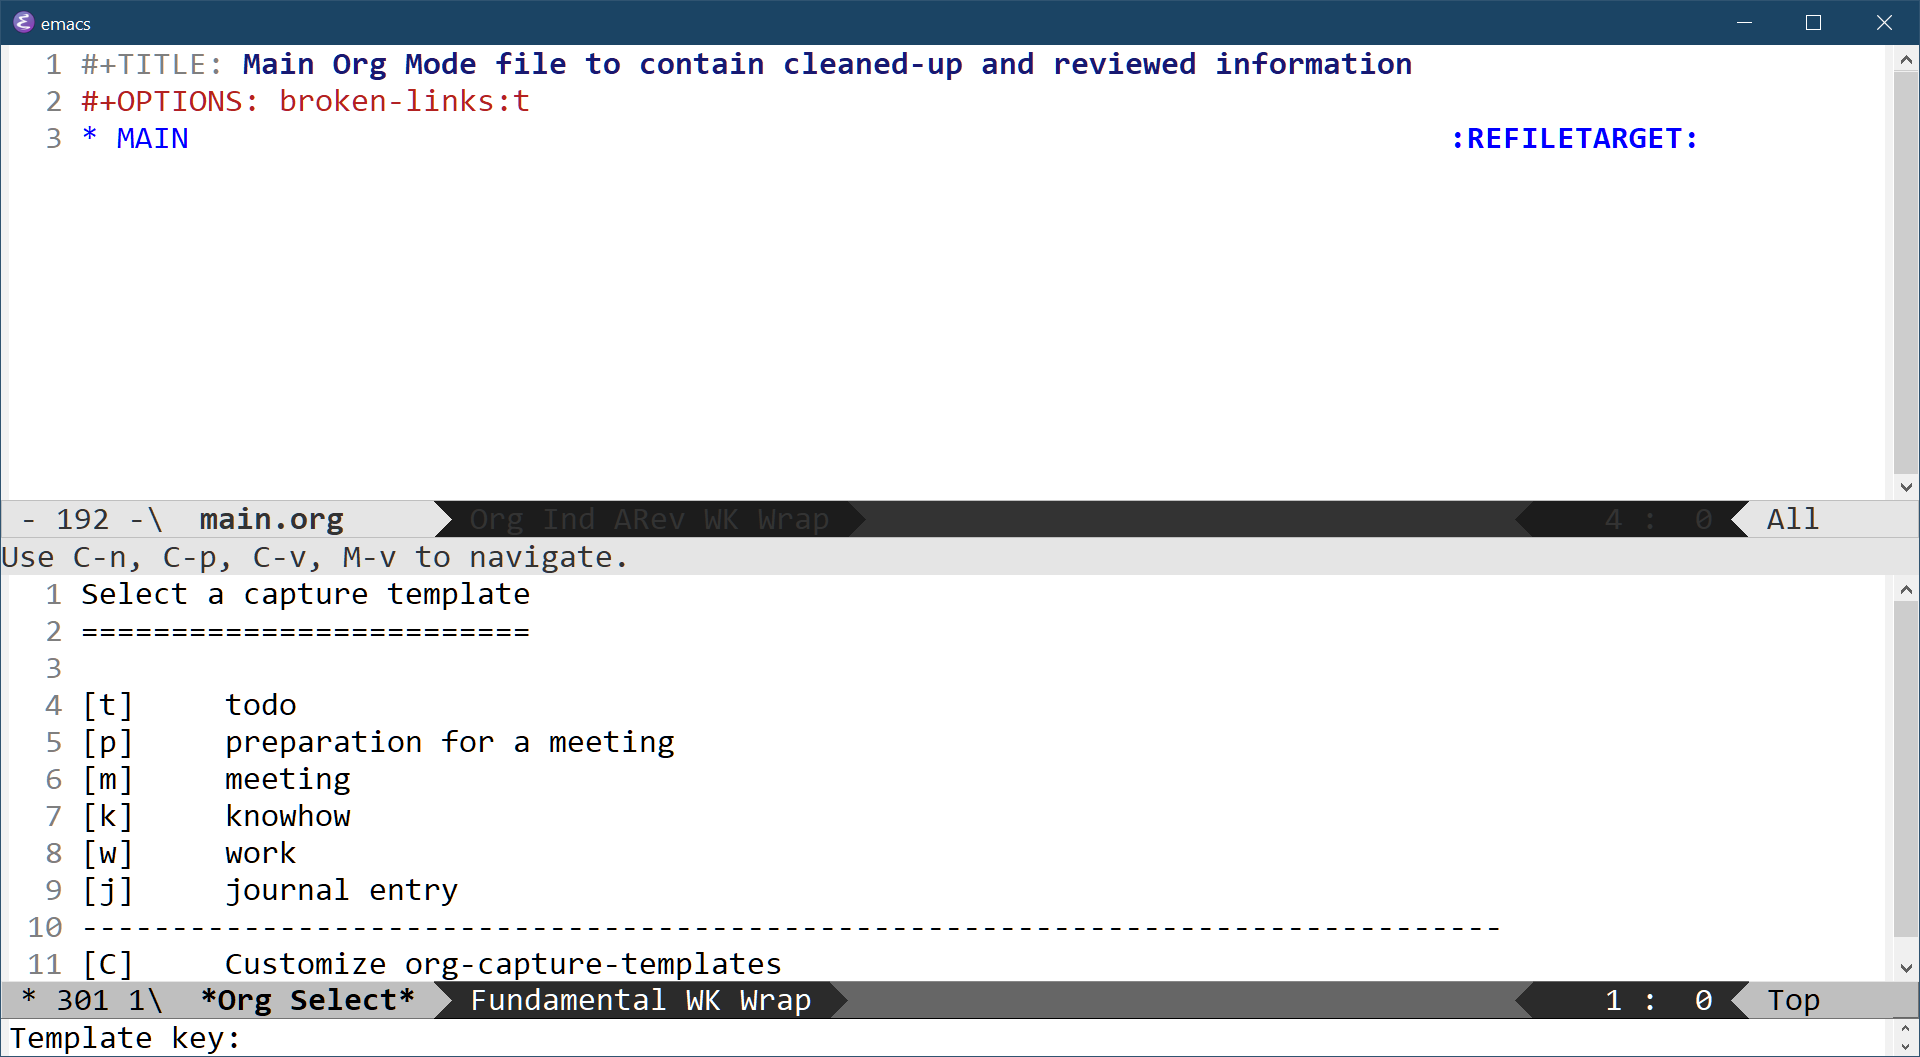
| 1 | Create new todo entry. | “C-c c”, then “t” |
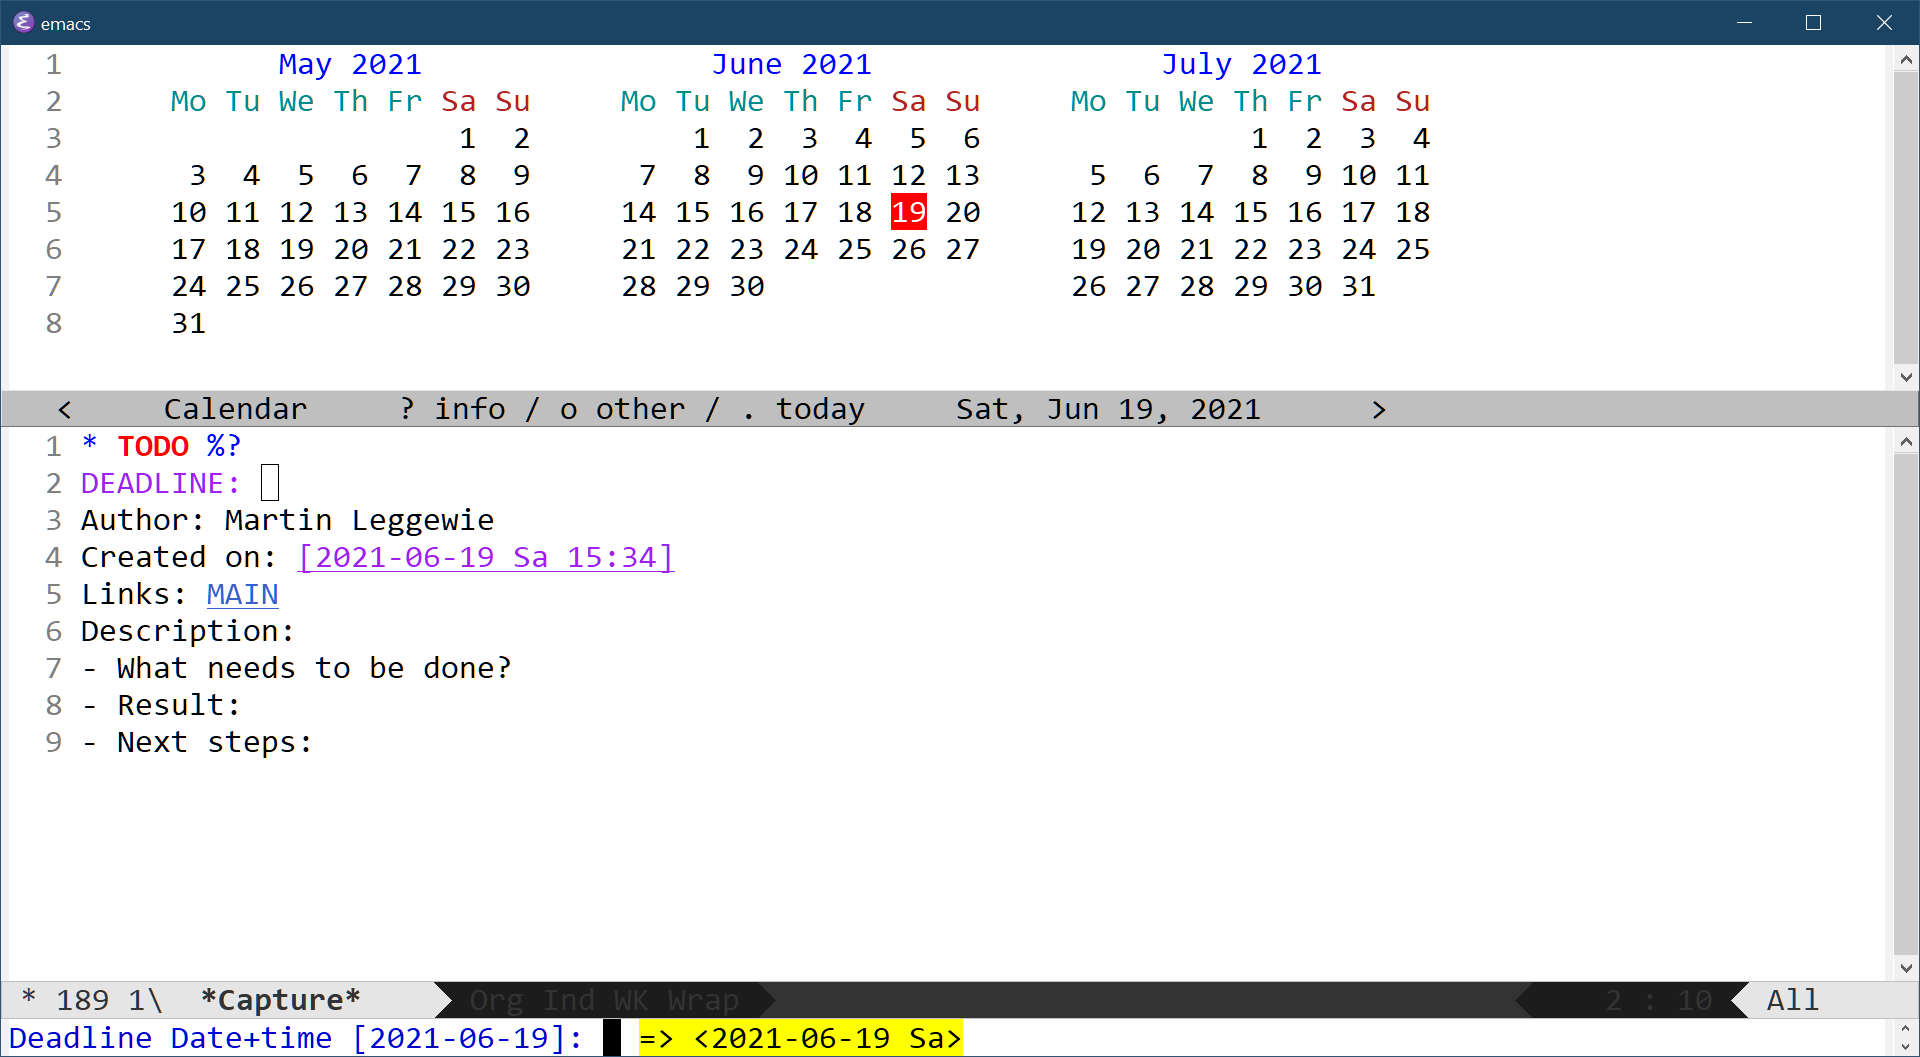
| 2 | Select the deadline date with the shown date picker. | “S-LEFT”, “S-RIGHT”, “S-UP”, or “S-DOWN”, then “RET” |
| 3 | Next to “TODO”: define a short and precise title, always start with a verb. | (just type) |
| 4 | If someone else needs to do the task: Change “TODO” into “WAITING” | “S-RIGHT” until WAITING is reached |
| 5 | Correct “Author”, in case you create the todo on behalf of someone else. | (just type) |
| 6 | Check/correct/delete “Links” section. | (just type) |
| 7 | Write details next or below to “Description”. | (use “-“ to structure the details) |
| 8 | Assign topic tag. If there is no proper topic tag, create one. | “C-c C-q”, then type “tpc_”, then use “TAB” for autocompletion, select the tag, then “RET” |
| 9 | Assign system tag (optional). | “C-c C-q”, then type “sys_”, then use “TAB” for autocompletion, select the tag, then “RET” |
| 10 | Assign person tag. | “C-c C-q”, then type “prs_”, then use “TAB” for autocompletion, select the tag, then “RET” |
| 11 | Finish todo entry. | “C-c C-c” |
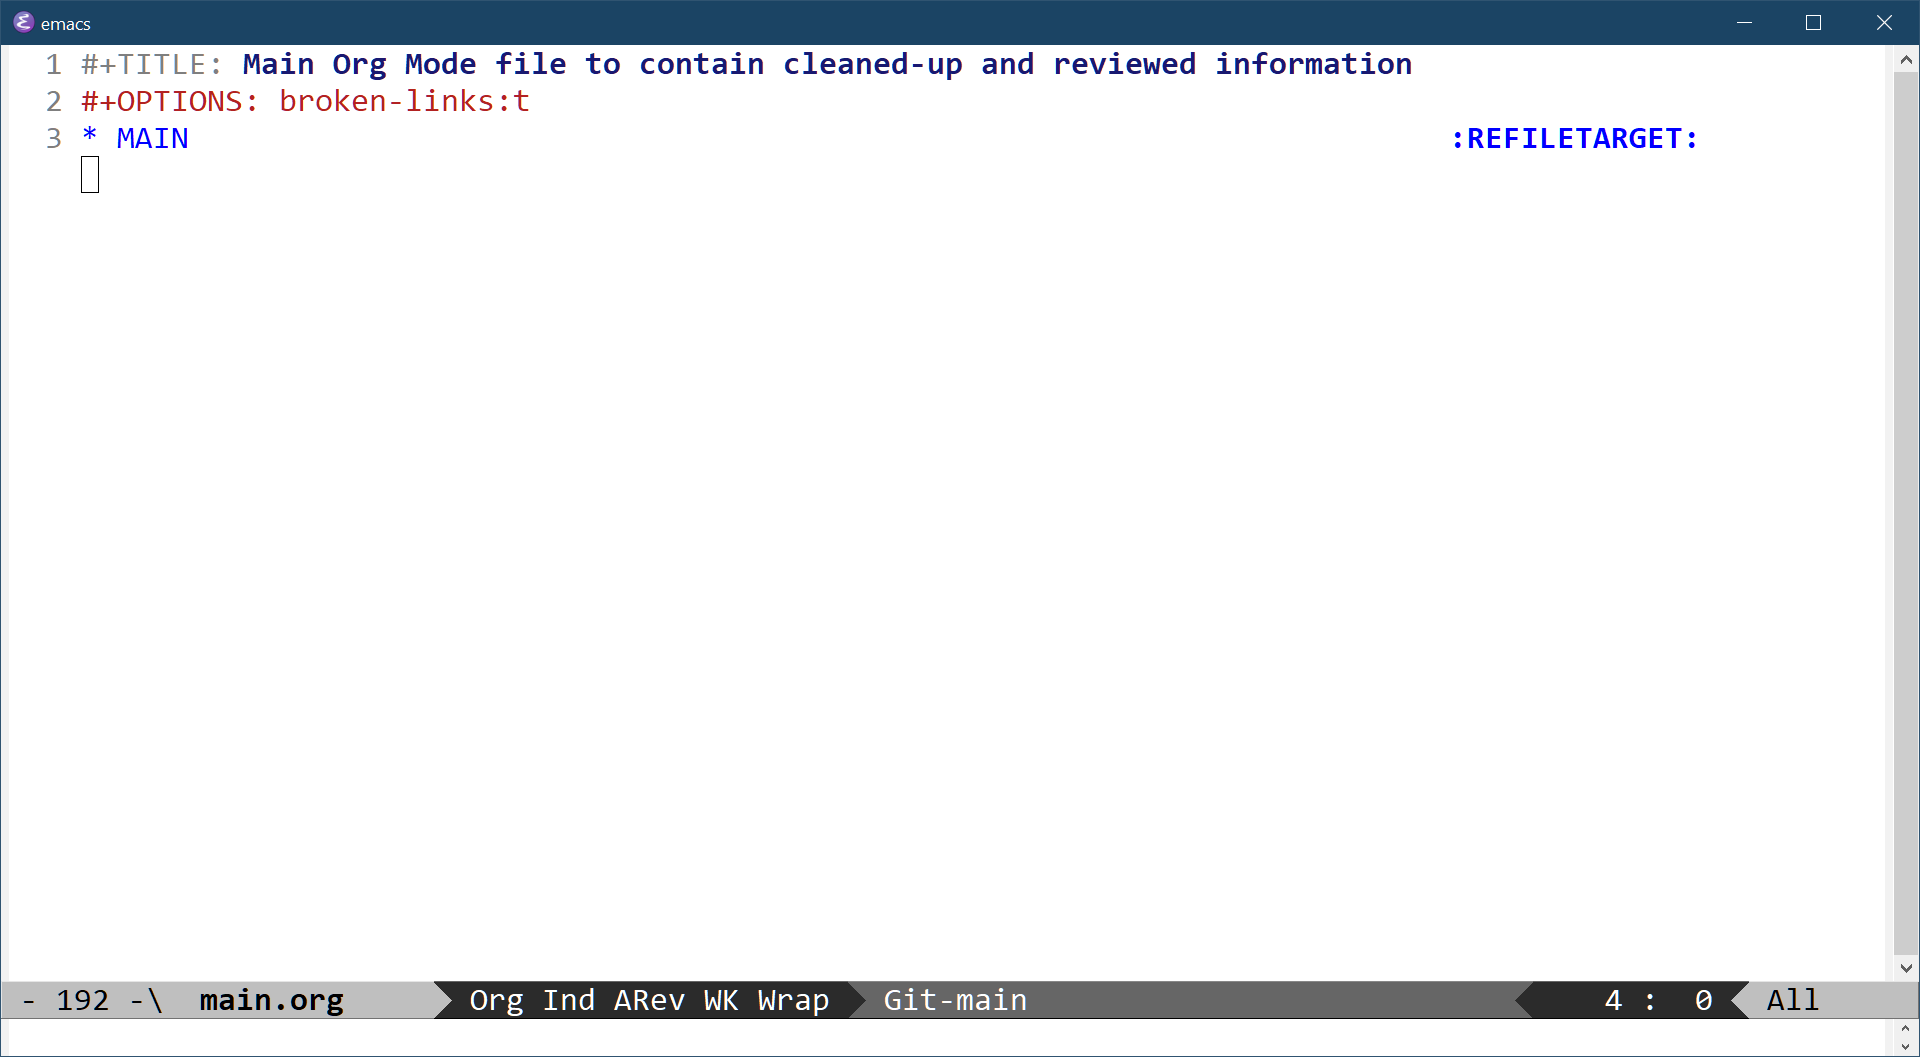
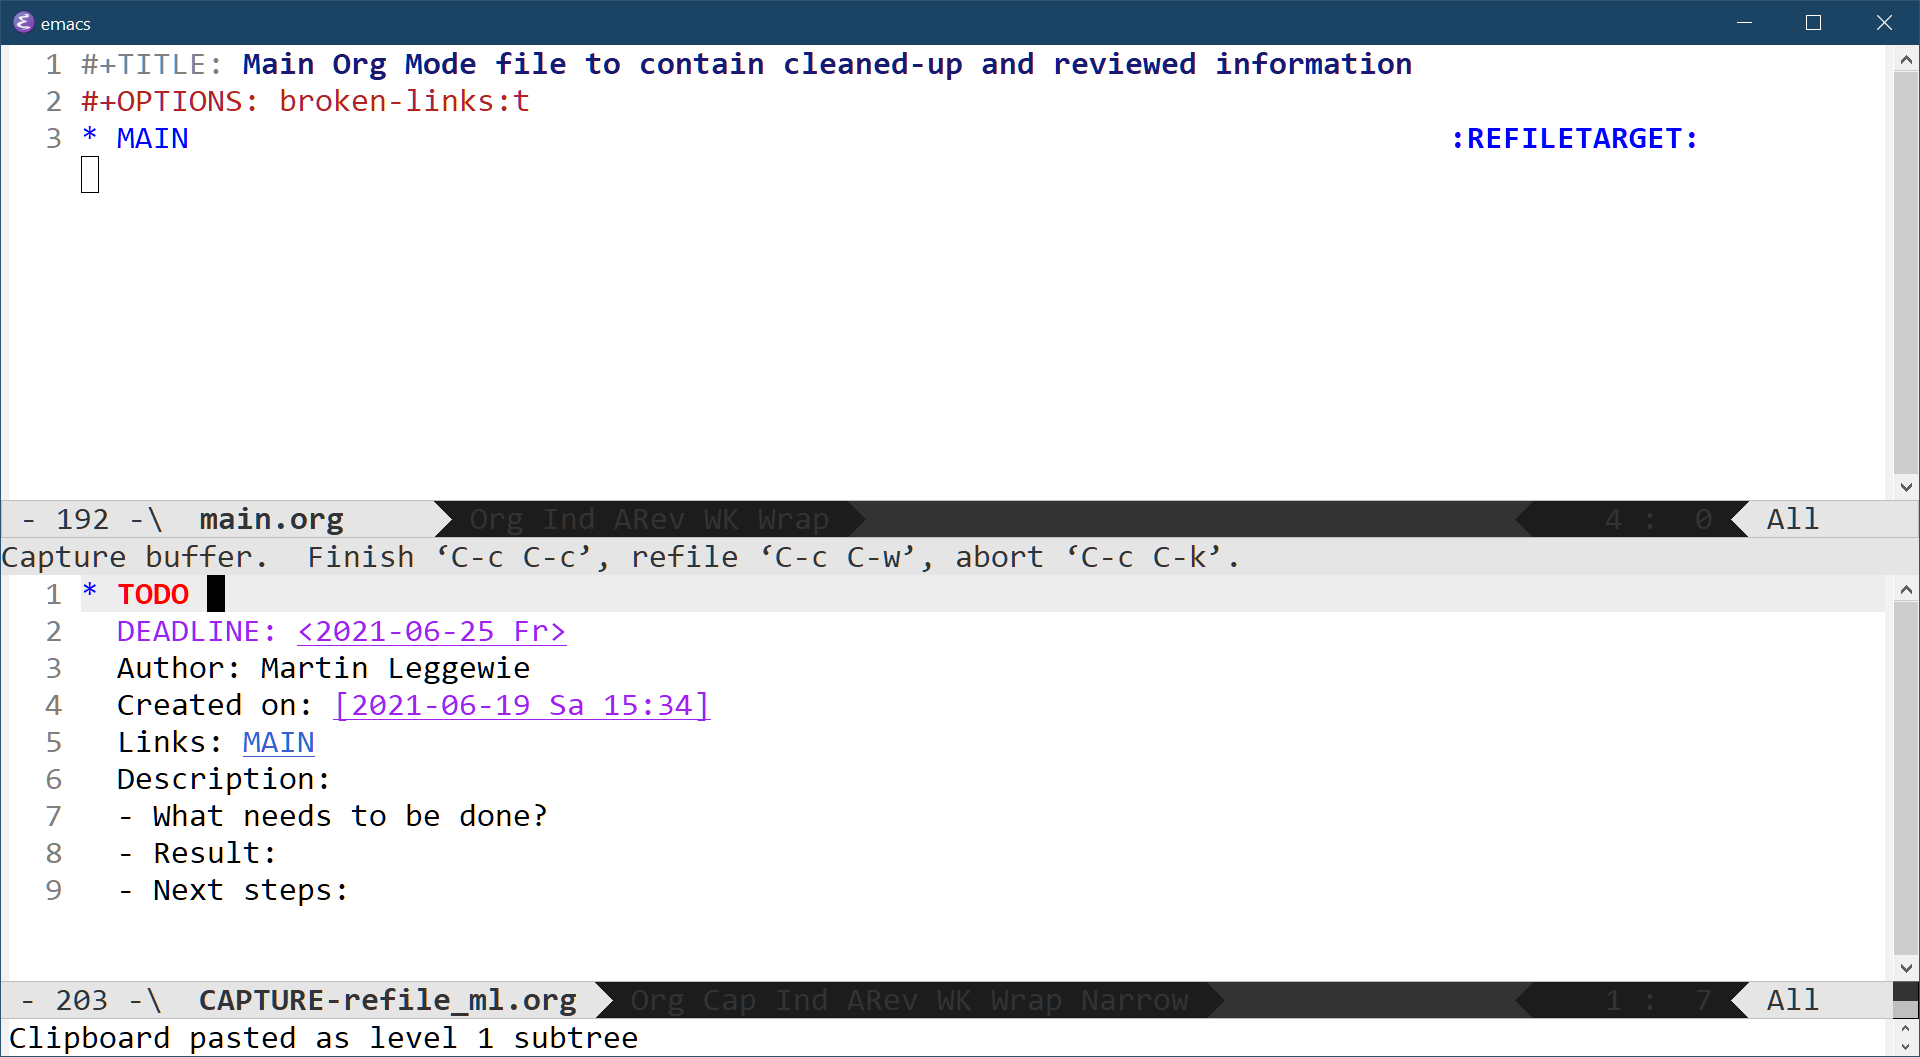
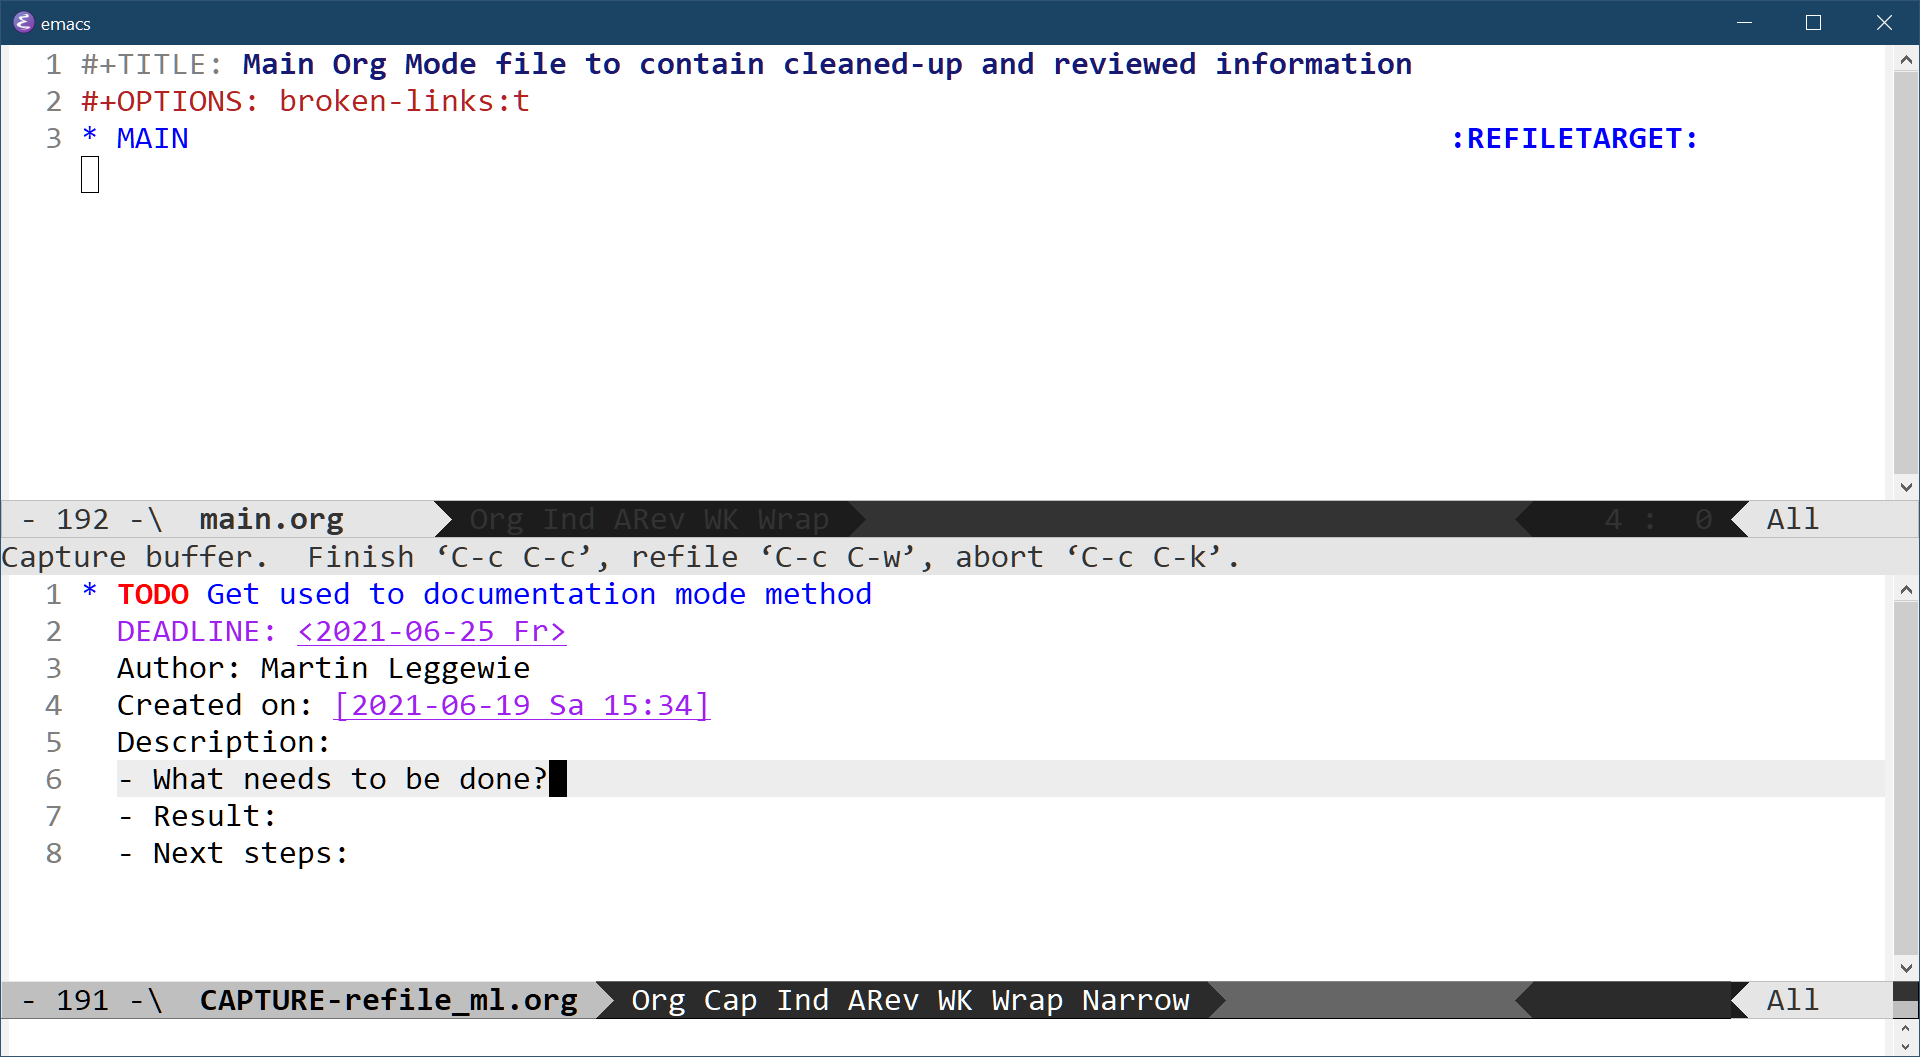
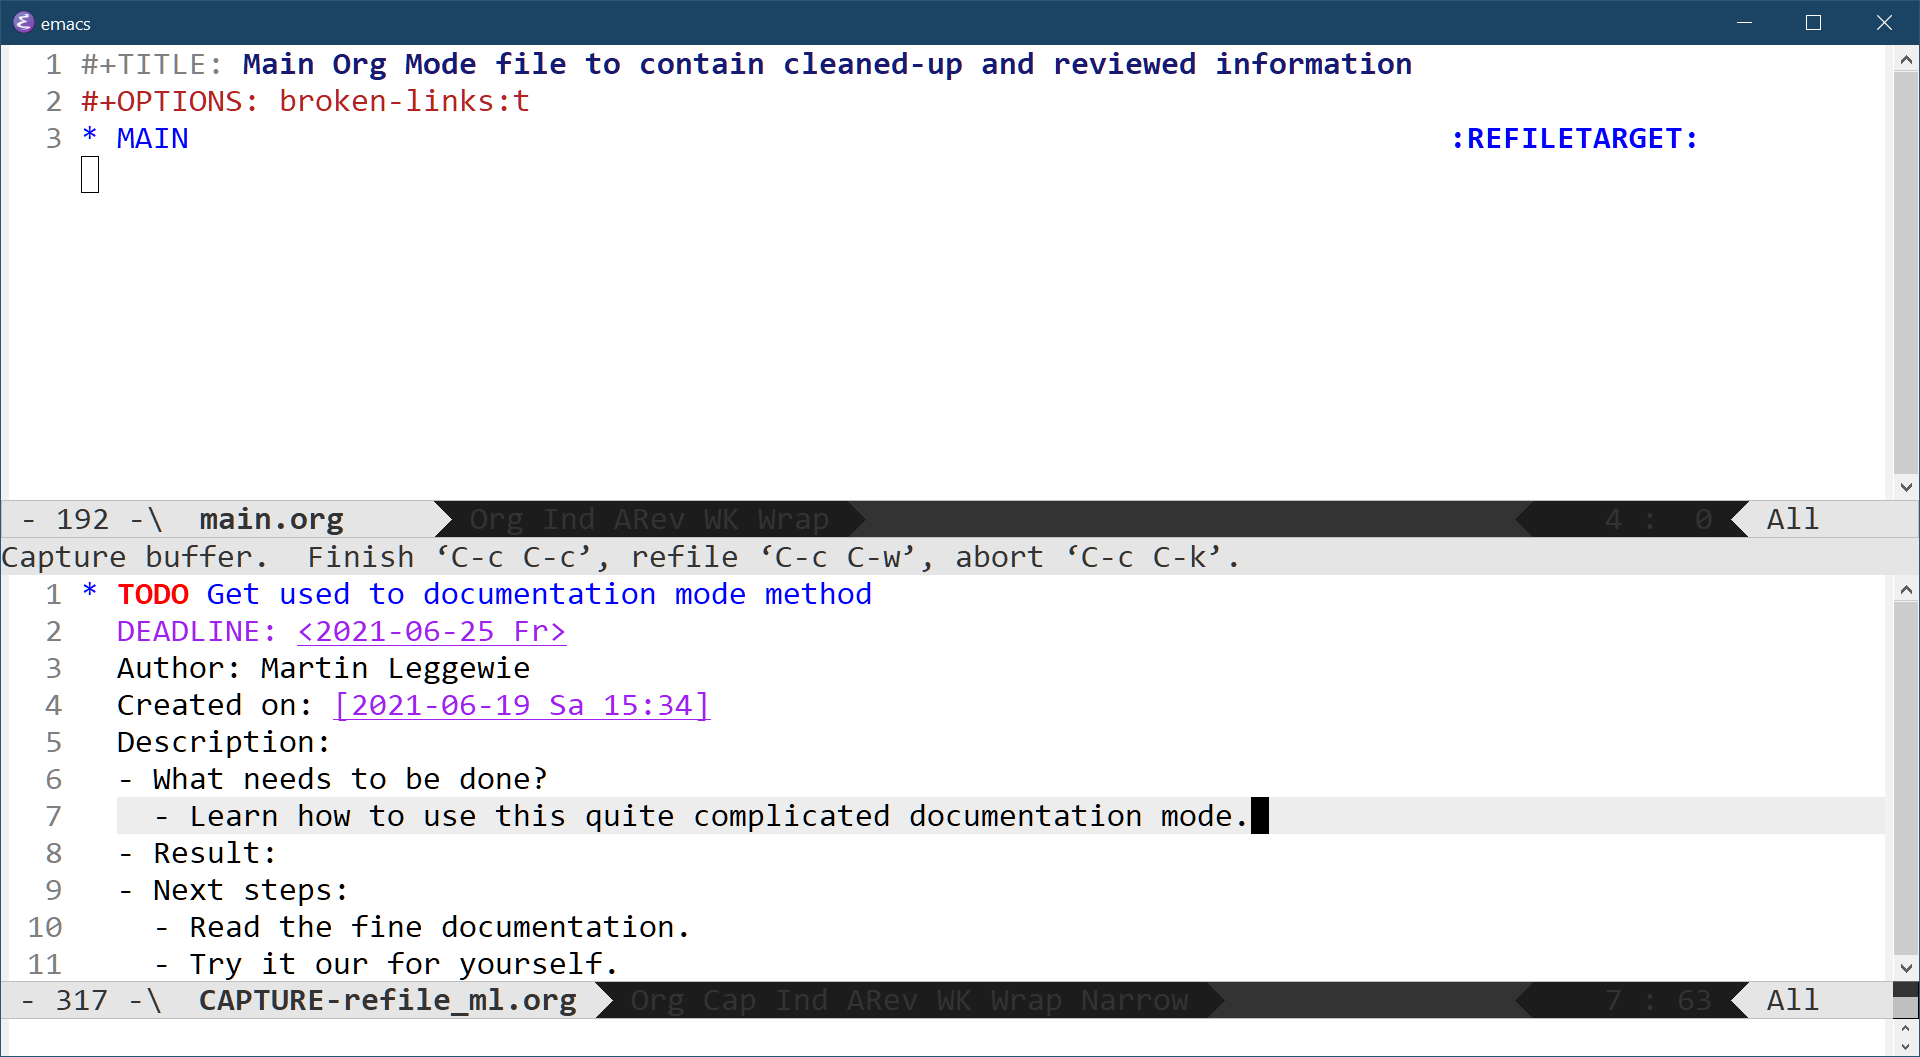
Example flow
The following example flow of screenshots might give you a better impression on what is going on. Please note that the screenshots are not one-to-one mapped to the steps describes above.


An already scheduled task has changed and needs documentation update
During normal lifetime of a scheduled task at least one change will happen: The work assigned to this task has been done, and we need to close it so that we no longer need to track it. But there are also some other types of changes which can happen. In this section we describe how we document all these types of changes.
We start working
- Change the Org entry type from its previous value (e.g., “TODO”) to “INPROGRESS”. You don’t have to manually change the entry type text. Instead you can use the “S-LEFT” and/or “S-RIGHT” keyboard shortcuts to do so.
Some intermediate work has been done
-
Add some more bullet points to the “Description” to add information about the progress. Typically, you would add these bullet points to the “Result” section.
-
In addition, you can start each new entry with a date entry which Org does NOT consider in its agenda logic. Use keyboard shortcut C-c ! to get the date picker shown, then select the correct date with “S-LEFT”, “S-RIGHT”, “S-UP”, or “S-DOWN”,, and then press “RET”. You will see that Org writes something like “
[2021-06-19 Sa]” instead of “<2021-06-19 Sa>”. Note the difference in the brackets.
Someone else outside our team needs to do the work
Even when someone else outside the team has to do the actual work, it is still our responsibility to keep track of it. The responsibility for this task stays with the team member whose person tag is assigned to the task. We keep track of this with the following two steps:
-
Change the Org entry type from its previous value (e.g. “TODO”) to “WAITING”. Again, you don’t have to manually change the entry type text. Instead you can use the “S-LEFT” and/or “S-RIGHT” keyboard shortcuts to do so.
-
Add the name of the outside person who is supposed to work on the task next or below “Description”, typically in the “Next steps” section.
The deadline has passed, but the work is still not yet done
Yeah, something like this should not happen, but it will. We accept reality, and we dare to move the DEADLINE date to a new date.
- Place the cursor to the day, month, or year, and change the value with “S-LEFT”, “S-RIGHT”, “S-UP”, or “S-DOWN”, then “RET”
The work has been done
We silently shout “Hurray!” because we feel satisfaction that we managed to accomplish something.
- Change the Org entry type from its previous value (e.g., “TODO”) to “DONE”. And again, you don’t have to manually change the entry type text. Instead you can use the “S-LEFT” and/or “S-RIGHT” keyboard shortcuts to do so.
The work is not needed anymore
- Change the Org entry type from its previous value (e.g., “TODO”) to “CANCELLED”. By now you should know what will come now: You don’t have to manually change the entry type text. Instead you can use the “S-LEFT” and/or “S-RIGHT” keyboard shortcuts to do so.
A meeting happens or has happened
Typical examples for such meetings: phone call, email conversation, video conference, workshop, “another person just wants to quickly ask something”. It does not make a difference if such meeting was planned or not.
| No. | Step description | Shortcut |
|---|---|---|
| 1 | Create new meeting entry. | “C-c c”, then “m” |
| 2 | Next to MEETING, define a short but still precise title. | (just type) |
| 3 | Correct “Date”, in case you have started the scenario days after when the event really happened. | “S-UP” or “S-DOWN” |
| 4 | Correct “Author”, in case you want to give credit for the documentation to someone else. | (just type the name) |
| 5 | Specify list of participants. Your name is already filled in at the end of the list. | (just type the names) |
| 6 | Next or below to “Description” describe the content of the meeting, using simple bullet points. | (use “-“ to structure the details) |
| 6a | Describe the goal of the meeting. Use meeting invitation text, if you like. | |
| 6b | Describe what has been discussed, using “Topic” as some kind of sub-heading. | |
| 6c | Describe the next steps. If these steps are for you, create todo entries. | |
| 7 | Assign at least one pre-defined topic tag. | “C-c C-q”, then type “topic”, then use “TAB” for autocompletion, then “RET” |
| 8 | Finish meeting entry. | “C-c C-c” |
A meeting is about to happen in the near future, and you need to note done some topics for this meeting
Sometimes, when a new meeting is coming up soon, you already have some topics/questions you would like discuss in that meeting. In that case, you can already reserve a spot to document these questions/topics accordingly so that you will not forget them until then. For this, there is a specific PREPAREMEETING entry reserved for this scenario.
To create such a new PREPAREMEETING entry, you can follow the same rules as in the standard MEETING entry. Only exception is how you create this new entry (use “p” instead of “m”).
| No. | Step description | Shortcut |
|---|---|---|
| 1 | Create new meeting entry. | “C-c c”, then “p” |
| … | (from here on follow the same steps as standard MEETING). | … |
Then, when the meeting actually happens, you can quickly change the entry type from PREPAREMEETING to MEETING like this:
- Place the cursor somewhere on the word PREPAREMEETING, and then
- Hit “S-RIGHT” as often as needed until MEETING has been reached.
Some know-how information arrives
Typical examples for such information arrivals: You come across such information in the form of self-written text, or a link to an external document, or an attached file. Maybe you have received an email with such information? Or you have created some step-by-step instructions for yourself?
So, if you have some information which you find worth persisting, then you can create a KNOWHOW entry as follows:
| No. | Step description | Shortcut |
|---|---|---|
| 1 | Create new know-how entry. | “C-c c”, then “k” |
| 2 | Next to KNOWHOW, define a short but still precise title. | (just type) |
| 3 | Correct “Date”. Date should define when the information was created, not when you have documented it. | “S-UP” or “S-DOWN” |
| 4 | Correct “Author”, in case the information has not been created originally by you. | (just type) |
| 5 | Fill in “Description” to contain some more information about the know-how. | (just type) |
| 6 | (optional) Fill in “Links”. | (just type) |
| 7 | (optional) Attach file(s). | /(Check other scenario desribed in this document) |
| 8 | (optional) Assign pre-defined topic tags. | “C-c C-q”, then type “topic”, then use “TAB” for autocompletion, then “RET” |
| 9 | Finish know-how entry. | “C-c C-c” |
You want to document some noteworthy event just for yourself (“diary scenario”)
If you have accomplished something which you want to note down for a possible later use or just for your memoires, then this diary scenario is the one for you. You can create a JOURNAL entry in which you just describe what you feel noteworthy.
The difference between such a JOURNAL and a KNOWHOW entry is that JOURNAL entries are stored at a location which only you can access. Your team members will not see these JOURNAL entries. And this is different for the KNOWHOW entries because the KNOWHOW entries are destined to be of interest for all team members.
You can create a JOURNAL entry like this:
| No. | Step description | Shortcut |
|---|---|---|
| 1 | Create new journal entry. | “C-c c”, then “j” |
| 2 | Next to JOURNAL, define a short but still precise title. | (just type) |
| 3 | Correct “Date”, if needed. | “S-UP” or “S-DOWN” |
| 4 | (optional) Fill in “Description” if needed, or remove this line. | (just type) |
| 5 | (optional) Assign pre-defined topic tags. | “C-c C-q”, then type “topic”, then use “TAB” for autocompletion, then “RET” |
| 6 | Finish journal entry. | “C-c C-c” |
You need to review and then move the information you have collected to the correct location
One specialty of Org mode is that it stores most types of Org entries (TODO, MEETING, KNOWHOW) in a so-called “refile” file. The only exception is the JOURNAL entry because this is only for your eyes only, whereas the refile file is part of the team files and Git repo.
Now, the refile file acts as an incubator for all the information you have written down in the format of the just mentioned Org entry types.
Org mode offers this incubator feature because it knows how it typically goes: Most of the time you are in a hurry and under stress, jumping from one meeting directly into the next meeting. If you are in such a working mode (ha, mode!), then no-one can expect that the information you collect during all these meetings is in a good shape right from the start. By placing such information in the refile file, you signal to the rest of the team that yes, there is some content coming up, but no, it is not yet in a form that the others should already count on it.
To use a comparison from the developer’s world: Think of the refile file as some kind of feature branch which only belongs to you. Everyone else can have a look at the current state of the information, but no-one can expect that this information is already ready to be shared.
But now and then you need to take care of the Org entries because you cannot leave your work in the feature branch aka refile file forever. You review the Org entries in the refile file one by one, taking care of aspects like the following:
- Even if it is difficult to review yourself: Do your sentences you have written down make sense? Do you think that someone else can understand what you want to say?
- Did you set all the correct tags?
- If you scheduled a TODO: is the deadline value set correctly?
Once you are happy with that Org entry, you can move it to the main Org file “archedl.org” like this:
| No. | Step description | Shortcut |
|---|---|---|
| 1 | Locate cursor to some line in the entry you want to move. | “UP” or “DOWN” |
| 2 | Start the move command. | “C-c C-w” |
| 3 | Select “archedl.org” or “knowhow.org” as the target in the minibuffer at the bottom. | TAB, then select the correct file, then enter. |
Now that you have added a new entry to the final destination file, please directly commit this to the main branch.
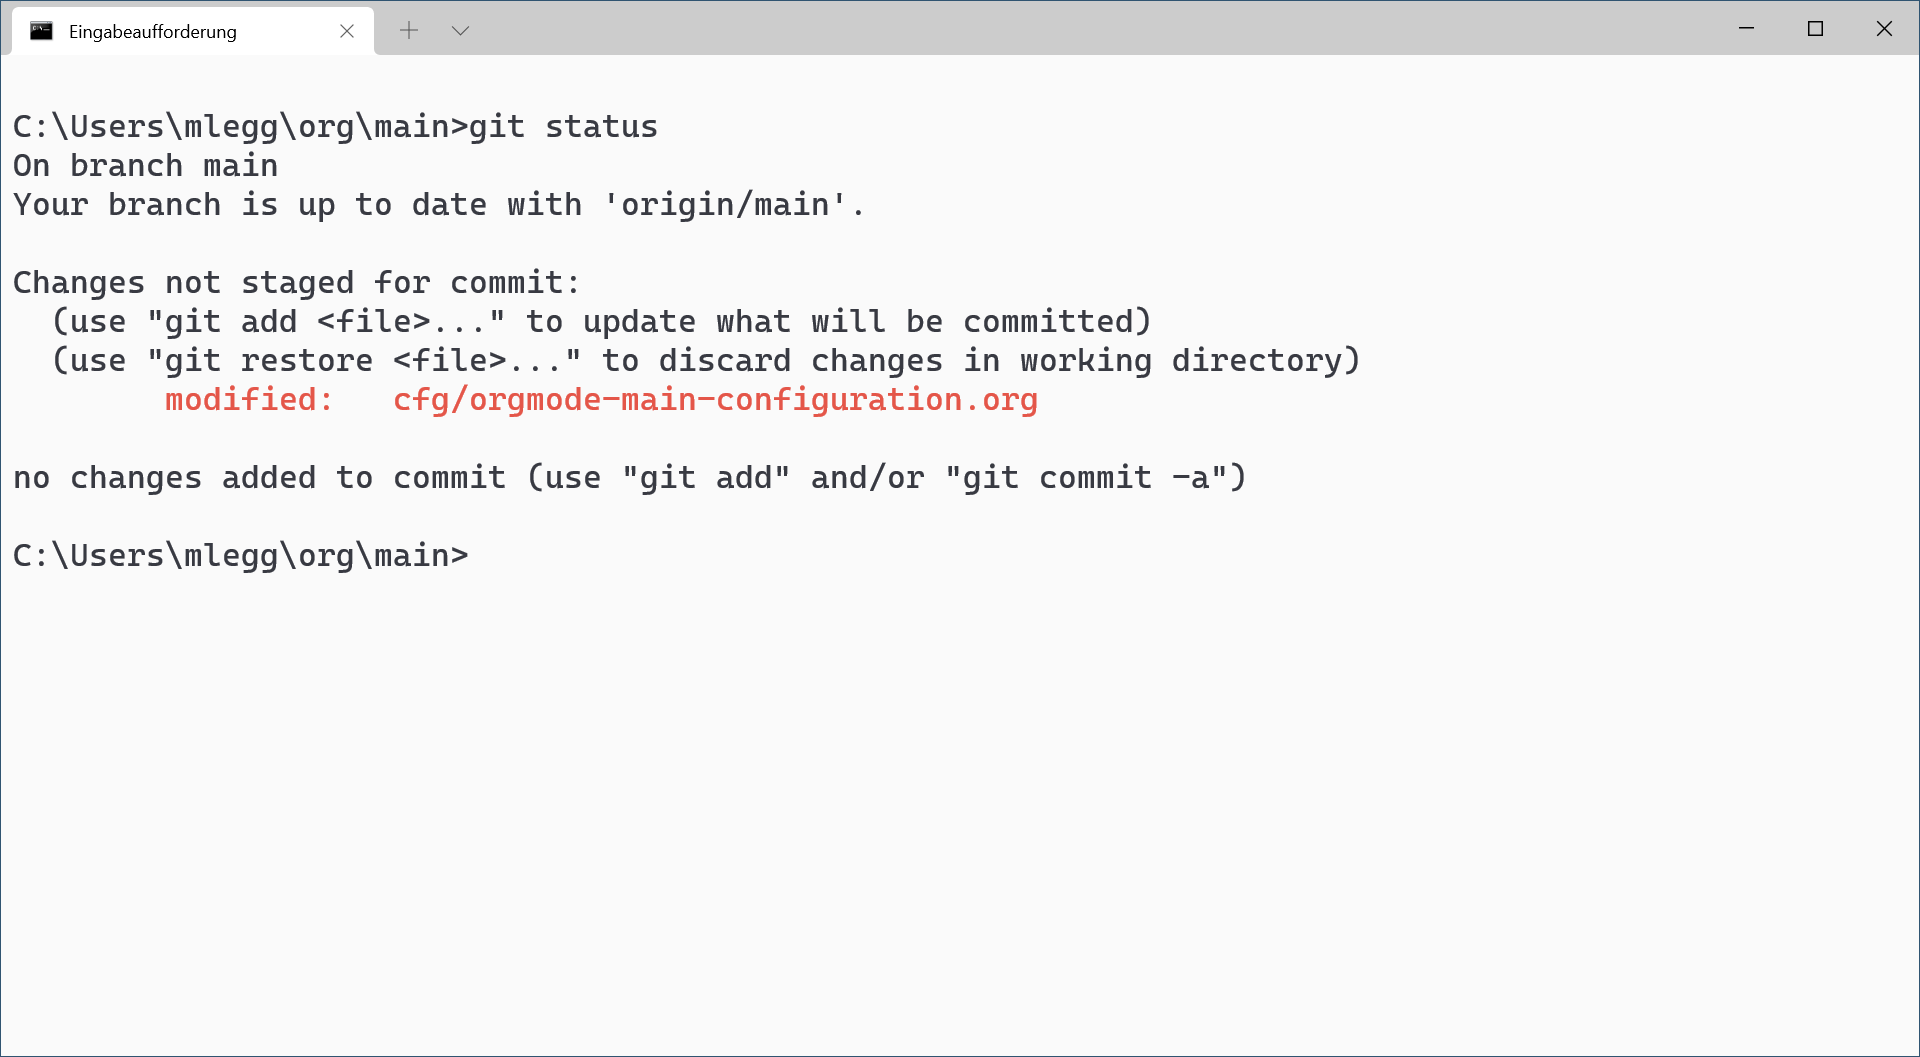
You need to Git commit and push something
As already mentioned before, I store all the Org files and therefore all the information I collect in Git repos. Git is a very powerful version control system, and with everything which is powerful I recommend taking a little extra care about how to use it, especially when working together with others.
Therefore, I describe my basic Git etiquette for the main branch in the following list:
- Make one commit for each Org entry omce you have moved it to its final destination file.
- Do not make a commit for entries in the refile file. Like with source code, I only want to have finished work in a concise commit.
- Before you push your commit to the remote repo, make sure that your commit will just add to the end of the Git commit graph. I do not want to see these incomprehensive “railroad track switch nightmares”.
If you want commit intermediate states of your work, then just please create a feature branch for that. On that feature branch you can basically do what you want. Before placing your commit on the main branch, you then can rebase all your commits to one concise commit which you then can place on the end of the main branch.
How you actually execute all the Git commands is of course completely up to you. I can just recommend a combination of:
- Git on command line
- Emacs Magit package.
- Visual Studio Code plus GitLense and GitGraph extensions.
- IntelliJ IDEA CE and its in-built Git client.
Scenarios - How to find something back which you have documented earlier
Of course it is nice that you have documented quite some information by applying the scenarios from the previous section. But this all does only make sense if you can find back the information quickly. For this I describe typical report requests in the following subsections.
What has happened so far, and what are your concrete tasks in the coming time periods?
To get an overview of all the meetings and todos which happened so far, as well as the list of all the upcoming tasks, Org mode offers the agenda command. One of the command’s feature is the agenda view which mainly shows a calendar listing all the entries which are scheduled for a given time period.
You can open the agenda view and then do an example walk-through through its features like this:
| No. | Step description | Shortcut |
|---|---|---|
| 1 | Open the agenda view. | “C-c a”, then “a” |
| 2 | Change from “week” view to “day” view. | “d” |
| 3 | Change from “day” view back to “week” view. | “w” |
| 4 | Move back one week. | “b” |
| 5 | Move forward one week. | “f” |
| 6 | Close the agenda view. | “q” |
In case there are any tasks which have a due date in the currently selected week/day, the agenda view will emphasize them.
Which (unfinished) tasks are assigned to you at all?
In addition to “What do I have to do today” another common question is: “What are all the tasks which are assigned to me at all?” For questions like these the agenda command offers a different type of view which let’s you search entries with a specific tag assigned to them. To get this information, the precondition is that all these tasks are correctly tagged. Obviously.
In the following example, I show how this works for myself, using the “prsml” tag:
| No. | Step description | Shortcut |
|---|---|---|
| 1 | Open the query view. | “C-c a”, then “m” |
| 2 | Type “prsml” in the minibuffer at the bottom of the frame. Hit enter. | (just type) |
| 3 | Go through the huge amount of entries assigned to me until you find oen which interests you. | UP and/or DOWN |
| 4 | Show details of this entry. | “TAB” |
| 5 | Close the query view. | “q” |
The drawback is that this view also shows all the entries which are already done. As usual with Emacs and Org mode, you can extensively customize it, and this is especially true for the agenda command. It is possible to configure predefined queries which you then can quickly execute with a simple shortcut.
After you have performed step 1, you will see that agenda command shows some more shortcuts besides the default ones like “a” and “m” Below the list of pre-defined queries you will find some customized queries which you can perform by simply hitting “1” and “2”. The “2” is the one I have configured for myself.
So, the abovementioned list of steps change to this:
| No. | Step description | Shortcut |
|---|---|---|
| 1 | Open the customized “prsml” view. | “C-c a”, then “2” |
| 2 | (not needed anymore) | |
| 3 | Go through the huge amount of entries assigned to me until you find oen which interests you. | UP and/or DOWN |
| 4 | Show details of this entry. | “TAB” |
| 5 | Close the query view. | “q” |
Nice, isn’t it? In case you will become part of our team, then we can quickly add such a specific query for you as well!
What happened so far for a given topic?
Besides knowing which tasks are assigned to you and maybe scheduled for the very near future, the other typical situation is that you would like to know what has happened related to a given topic. To get the answer, you again use the query view. So, you follow the same list of steps as are shown in the previous section. Only this time you do not enter “prsml” as the search tag, but use one of the other types of tags.
For example: If you want to know what has happened so far related to a mystical topic called “TPA”, you would use the tag “tpctpa”. If you do not know which tag you would need to enter, please continue reading with the next section.
Which tags are there at all?
If you just want to get a quick overview of which tags are defined and used at all throughout the whole folder structure, you can also use the agenda command for this:
| No. | Step description | Shortcut |
|---|---|---|
| 1 | Open the query view. | “C-c a”, then “m” |
| 2 | Show all the tags there are. | TAB |
| 3 | Close the query view. | “ESC” “ESC” “ESC” |
Admittedly, this is presumably not the original idea of this feature, but what the heck! In addition, you can also check the Org mode configuration file as well to get the list of all the tags which were intentionally created.
Martin Leggewie, 2021-06-20